There are probably as many claims to the origin of baklava as there are Middle Eastern countries. Therefore, I will not argue here that it has Turkish origin. What I will say, however, is that it is probably the most popular dessert in Turkey, with many pastry shops specializing in different kinds of baklava in every Turkish city. My little research on the history of baklava revealed that this interest in baklava goes all the way back to the Ottoman times, and that Turks have a rightful claim to the perfection of baklava if not to its creation. In fact, for four hundred years from 16th Century on, until the decline of Ottoman Empire in 19th Century, the kitchens of Imperial Ottoman Palace in Constantinople became the ultimate culinary hub of the empire ... Armenian, Greek, Persian, Egyptian, Assyrian and occasionally Serbian, Hungarian or even French chefs were brought to Constantinople, to be employed at the kitchens of the wealthy. These chefs contributed enormously to the interaction and to the refinement of the art of cooking and pastry-making. Towards the end of 19th Century, small pastry-shops started to appear in Constantinople and in major Provincial capitals, to cater the middle class, but the Ottoman Palace have always remained the top culinary "academy" of the Empire, until its end in 1923. It was in this environment that baklava evolved from its humble origins of Assyrian times to what it is today. (For more information on the history of baklava, refer to this link where the italicized text above was also taken from.)
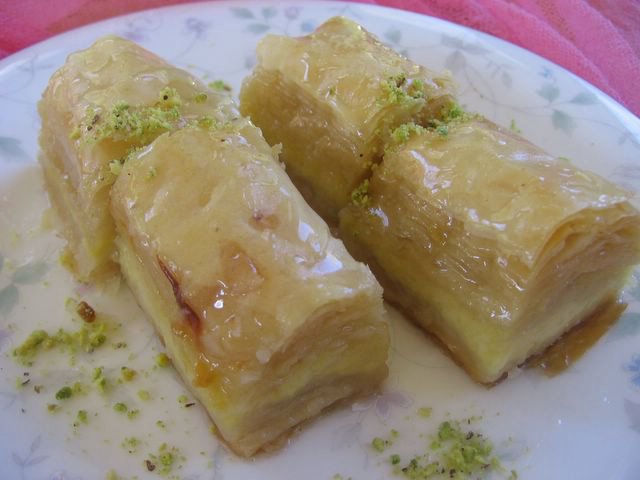
Zooming back from Ottoman palaces to my house, Yurdaer, who is by no means a picky eater otherwise, is quite discriminating when it comes to his baklava. When we lived in California, I felt that my trials at home with store-purchased Phyllo dough did not really satisfy him; and surely enough, when interrogated, he confessed that there seemed to be something lacking in taste. After we moved to NY, he was happy to find out that he could buy baklava --the way he likes it-- from the Turkish bakeries in Paterson, NJ. Due to his lack of appreciation coupled with my lack of interest in syrupy desserts, I have not attempted to make baklava at home until I chanced upon this recipe (from Ayla Esen Algar's Turkish Cooking) with a twist: Instead of the traditional nut filling, this one comes with a crème pâtissière filling. You see, since it is not a traditional baklava, it can not be compared unfavorably to Paterson baklavas. Not surprisingly, Yurdaer loves this dessert, and it is one of my fallback recipes whenever I have to use up egg yolks left over from a baking project using only the whites.
Crème Pâtissière Filling:
6 egg yolks
1/4 c sugar
2 c hot milk
1/2 c flour
1/2 tsp vanilla
Syrup:
1 1/2 c sugar
1 c water
1 tsp lemon juice
Baklava:
1 c butter, melted
1 lb thin phyllo pastry
For the filling, beat the egg yolks and sugar together until thick and pale yellow. Mix in the flour and blend well. Gradually stir in the hot milk and cook, whisking with a wire whisk, until the mixture is thick and bubbly. Reduce the heat to low and cook for a few minutes more. Remove from the heat and add the vanilla.
Make the syrup by mixing the water with the sugar and bringing it to a boil. Add the lemon juice and simmer for 5 minutes more. Cool.
Preheat the oven to 350F. Brush a 9"x13" pan with butter. Unfold the phyllo pastry. Take one sheet at a time, keeping the remaining shets covered to prevent them from drying out. Place half of one sheet in the baking pan and brush with melted butter. Fold the other half of pastry shhet over the first half. Brush it with melted butter. Continue this way to build up layers until you use up half the package. At this point, spread the filling evenly over the phyllo layers, and continue with the remaining phyllo sheets until they are all layered in the manner described earlier. When done, press the sheets gently with your hands, and cut the baklava into 30 or more rectangular pieces. Bake at 350 for 30 minutes. Reduce the heat to 300F, place a piece of aliminum foil loosely over the baklava, and continue baking for another 30 minutes. Remove from the oven and pour the cold syrup on the hot baklava. (Alternatively, you can pour the hot syrup on the cool baklava.) Let stand for several hours and recut the pieces before serving.
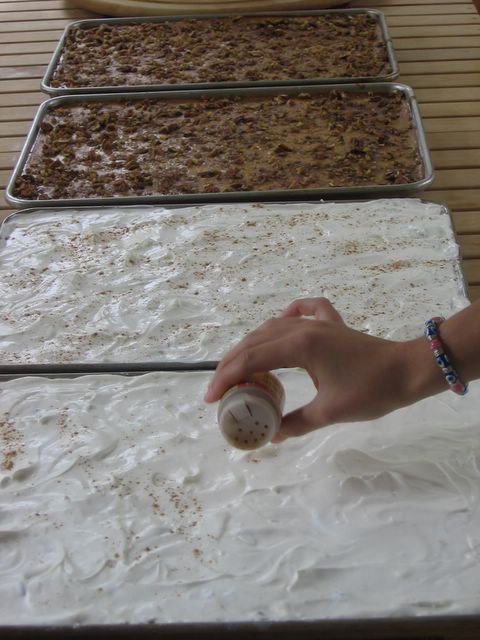
Last Saturday, I made pumpkin pie. I must confess that I prefer to use pumpkin in savory dishes --as in a curried cream of pumpkin soup-- rather than in desserts. But when fall comes and we start to see pumpkins everywhere, I pull out this recipe which I found years ago in a Pillsbury booklet. It is the only pumpkin pie that I really like, and I am afraid this has more to do with the crunchy pecan layer and delicious orange flavored cream topping than the pumpkin filling. The recipe is for a 9" pie pan, but repeated overflow incidents confirmed that the recipe makes too much filling for a pan of this size, so I recommend that you make this in a 10" deep dish pie pan, or even a 12"x8" pyrex pan. Let me also note that I substituted whipped heavy cream for the ready frozen whipped topping in the original recipe. Frozen whipped topping is already sweetened, so I had to sweeten my whipped cream, too. Unfortunately I forgot to measure how much sugar I added. All I can say is that it was not much. The resulting pie was light and delicious with the crunchy praline layer enhancing the smooth pumpkin and cream layers. (One last note to pumpkin lovers who might want to try this recipe: I made dessert for a crowd, so I had to modify the recipe into bars. The pie you see in the picture was made with the leftover pumpkin filling which was not much. If you stick to the measurements given below, your pumpkin layer will be thicker than in the picture.)
Crust:
Pie crust of your choice for a 10" pie pan
Filling:
1/2 c sugar
1 1/2 tsp pumpkin pie spice
1/4 tsp salt
16 oz can (2 c) cooked, mashed pumpkin
12 oz can (1 1/2 c) evaporated milk
2 slightly beaten eggs
Praline Layer:
1/4 c firmly packed brown sugar
2 tbs flour
1/4 c cold butter
1/2 c chopped pecans
Topping:
3 oz cream cheese, softened
2 tbs milk
1 tsp grated orange peel
1 c heavy cream
Enough sugar to sweeten the topping
Prepare pie crust and line your pie pan. Preheat the oven to 425F.
In a large bowl, combine all filling ingredients; beat until blended. Pour into pie crust-lined oan and bake for 15 minutes.
Reduce oven to 350F. In small bowl, combine brown sugar and flour. Using a pastry blender or fork, cut in butter until mixture resembles coarse crumbs. Stir in pecans. Sprinkle over the pumpkin filling. Bake for an additional 30-35 minutes or until a knife inserted in the middle comes out clean. Cool completely.
In a small bowl, combine cream cheese, milk and orange peel; mix until smooth. In another bowl, sweeten and whip the cream. Add the whipped cream to the cheese mixture and fold until the two are uniformly combined. Spoon over the cooled pie. Dust with pumpkin pie spice if desired.
Kataifi is very thin strands of partially cooked and dried wheat pastry sold in 1-lb packages. I know it as a Middle Eastern delicacy, although the brand name it is commonly sold under suggests that it may also be popular in the Balkans. I am personally not a fan of syrupy desserts, but the slightly unconventional first recipe I will give here (which I got from my Egyptian friend Nahed) is not too sweet, and everyone who tried it seems to like it. The amount of butter and cream in the recipe may seem alarming, but a little piece goes a long way, and it is definitely worth a try when you want a moderate sugar high. The second serving idea came about because I had some leftover kataifi from the first project. So I used the traditional walnut filling and made two miniature kataifis in my molds. They also turned out nice. In fact, the result inspired me to make kataifi for a crowd in muffin pans. I will let you know how that one turns out soon.
Kataifi with Cream Filling:
For the syrup:
12 oz sugar
6 oz water
1 tsp lemon juice
Vanilla or orange flower water if you want to flavor the syrup
For the Filling:
2 c heavy cream
1/2 c milk
2 1/2 heaping tbs corn starch
Vanilla or any other flavoring you like
For the kataifi part:
Kataifi (I had leftovers enough to make 2 mini kataifi from a 1-lb package)
2 sticks of melted butter
Ground pistachios for decoration
Preheat the oven to 350F. Place the kataifi in a large bowl. Pour the melted butter on it, and work the strands with your hands by gently pulling in opposite directions. In doing so, you should be seperating the strands while also coating them with butter. Continue until no more knots remain, and the kataifi becomes light, fluffy and evenly coated with butter. Set aside.
Dissolve the corn starch in 1/2 c cold milk. Add this to the cream and cook, stirring continuously, until the mixture thickens and starts to bubble. Add the desired flavoring and let cool.
Spread half of the kataifi evenly in a 9"x13" ovenproof pan. It is usually recommended to grease the pan, but I did not do it this time without any adverse results. Press down the kataifi. Spread the filling evenly on top. Now scatter the remaining kataifi on top of the cream layer, and press gently to form an even top layer. Bake in your preheated oven for 40-45 minutes or until golden brown.
Meanwhile prepare the syrup. Combine the sugar and water in a saucepan. Cook on medium heat, stirring continuously, until the sugar dissolves. Bring it to boil and let simmer for 5-10 minutes. Add the lemon juice and simmer a few minutes longer. Remove from the heat and flavor as desired.
When you pour the syrup on the kataifi, both the syrup and the kataifi should be hot. So if you made your syrup earlier, heat it briefly before you use it. Let the syruped kataifi stand for 10 minutes and so, and then unmold it to a serving platter to reveal the nicer, browner bottom side. Cut into slices, and serve warm or at room-temperature decorated with ground pistachios. This dessert is best eaten the day it is made. It does not really benefit from refrigeration because of the high butter content.
Mini Kataifi:
This uses the same recipe for the syrup and preparation of the strands with butter. The difference is in the molds it is baked in and the filling used. This time I used walnuts finely ground with a little sugar. You can use other nuts, too. Pecans and almonds work well, and pistachios are excellent.