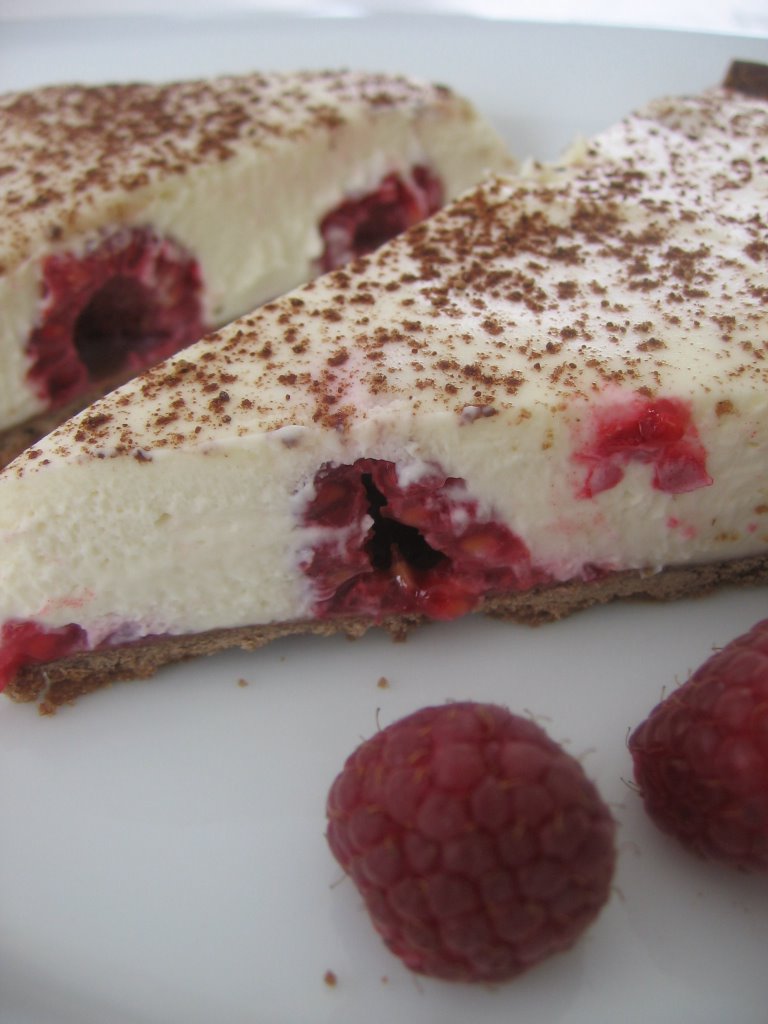
This tart is from The Art of the Tart by Tamasin Day-Lewis. My friend Ceyda made it first, and then she made it again, and then again for the third time in the course of a week. She did not bring us any samples, but she kept telling me how good it was. That was enough motivation for me to borrow the book from her and to give it a try myself.
The crust for this tart is crispy and keeps its crunch even the next day. It is also easy to roll unlike my usual chocolate tart pastry which I usually end up patting into the tart pan. I accidentally put 2 tbs of sugar in the dough (instead of 2 tsp as specified in the recipe), and I think that's how I'll do it again if I decide to designate it my official chocolate tart pastry. (As of now, I am still undecided.)
While I made this tart, I modified the recipe somewhat and I wrote it as I made it. The book called for boiling 1/3 c cream and 1 c of creme fraiche and pouring the mixture over the white chocolate to melt it. The creme fraiche I bought from the supermarket had the consistency of thick whipped cream. So I chose to add it to the filling at the end. You may want to revert to the original directions if you are making your own creme fraiche from scratch. (I tried to make creme fraiche once and was not very pleased with the result, but I would definitely like to try again. Creme fraiche is a new ingredient for me; although I knew about it for a long time, I started using it in my baking only recently. It definitely contributes to the taste of this tart, so I recommend you not to substitute for it by more cream as suggested by some sources.)
For the Chocolate Pastry Crust:
1 c flour
2 tsp cocoa powder
2 tbs confectioner's sugar
4 tbs cold butter, cut into small chunks
1 egg yolk
A few tbs ice water
For the Filling:
1 c creme fraiche
1 c heavy cream
6 oz white chocolate, cut into small pieces
1/2 lb raspberries
A little cocoa powder for decoration
Preheat the oven to 400F. Grease a 9" tart pan. Sift the flour, cocoa and sugar into the bowl of your food processor. Add in the chunks of butter and process briefly. Add the egg yolk and a tablespoons or two of water, and process just until the dough coheres. Wrap and refrigerate the dough for half an hour (I didn't). Roll on a surface sprinkled with some cocoa powder and line your prepared tart pan. Bake the pastry crust blind with beans for 20 minutes, and 10 minutes more without the beans. It should be crisp and slightly browned. Cool.
Bring 1/3 c of the whipping cream to boil. Pour it over the pieces of white chocolate and stir until completely melted. Refrigerate for a few hours. Whip the remaining 2/3 c cream until thick. Combine it and the creme fraiche with the white chocolate mixture, and stir until the filling comes together uniformly.
Crush some of the raspberries lightly so that they release some juice. Line the cooled pastry crust with the berries. Pour the filling, and use a spoon to smooth it over the fruit. Refrigerate for a couple of hours before you dust the tart lightly with cocoa powder and serve. The consistency and flavor definitely improve after a night of refrigeration.
I messed up this one. It almost did not make its way to Our Patisserie; but since there is a lot to learn from failures, I decided to post it anyway.
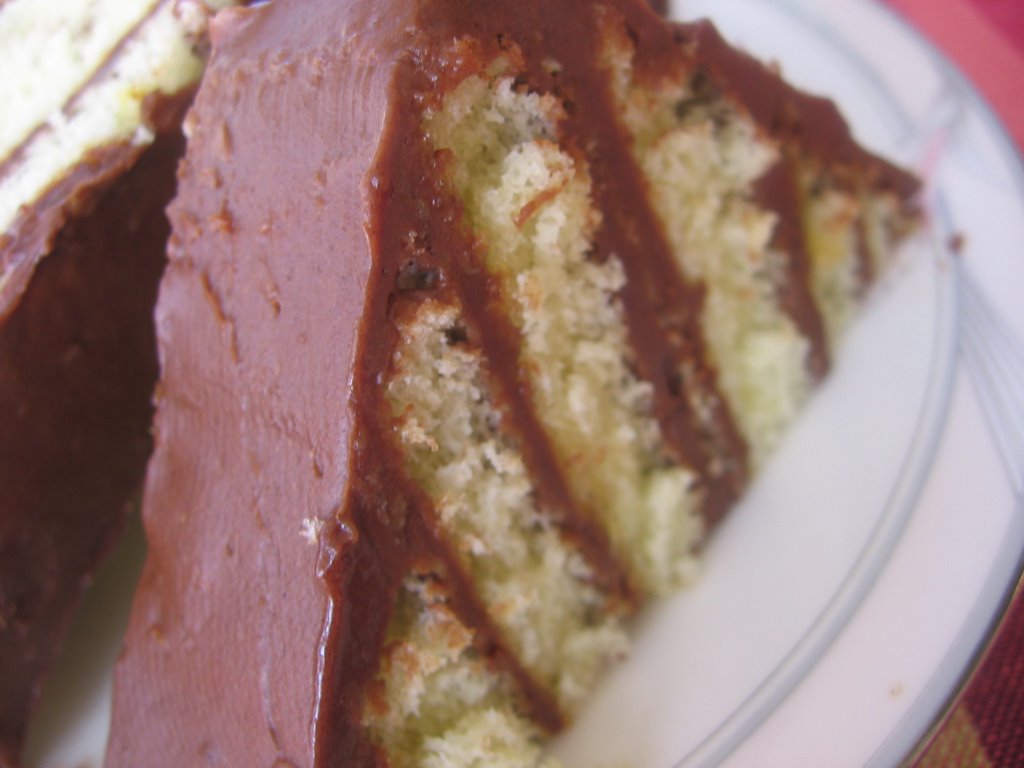
Here is an outline of the steps. Following the original recipe in Alice Medrich's Cocolat, I first made a hot milk sponge layer. I brushed it with syrup and spread it with chocolate buttercream. (The cake calls for 1 1/2 c of buttercream flavored with 10 oz of melted chocolate. In my case, there was quite a bit of leftover as I could not complete the project.) I cut the cake into 6 equal strips and stacked them on top of each other. As my cake was not even to start with, the stacked cake needed to be pushed down and leveled. Then I wrapped the cake in plastic and placed it in the freezer.
The next morning, I took it out before my children left for school. The idea was to picture the way to cut the cake, and I needed Zeynep's help to do that. What a mistake! It just was too hectic a time in our kitchen for me to think clearly and do the job right. I cut the cake too fast and unevenly. Worse still, I thought I cut it the wrong way. In my disappointment, I hastily put the pieces in a plastic bag and dumped the bag in the freezer.
Much later, after the house resumed its quiet and I was able to think again, I realized that there was no way I could have cut the cake wrong. I just could not see how to combine the pieces in the morning's rush. I took out the bag and tried to form a few decent looking slices to picture. Unfortunately, since my cake was in pieces, my slices were not as many layered as they should be. Also, this cake has a soft texture and because of the way the layers are formed, it is difficult to get nice looking slices even if you heat the knife before you cut it. Ideally, it should be sliced in a semi-frozen state.
Despite my less than happy experience with it, this is an easy cake to make. The only difficult part is the cutting. And of course, you should be in your right mind to figure out how to combine the pieces once they are cut. Better to avoid this when you have 3 kids running around in your kitchen. The funny thing is that the picture we took during cutting did not come out good, either. But I am a firm believer that a picture is worth a thousand words, so here is another one that I hope will help.
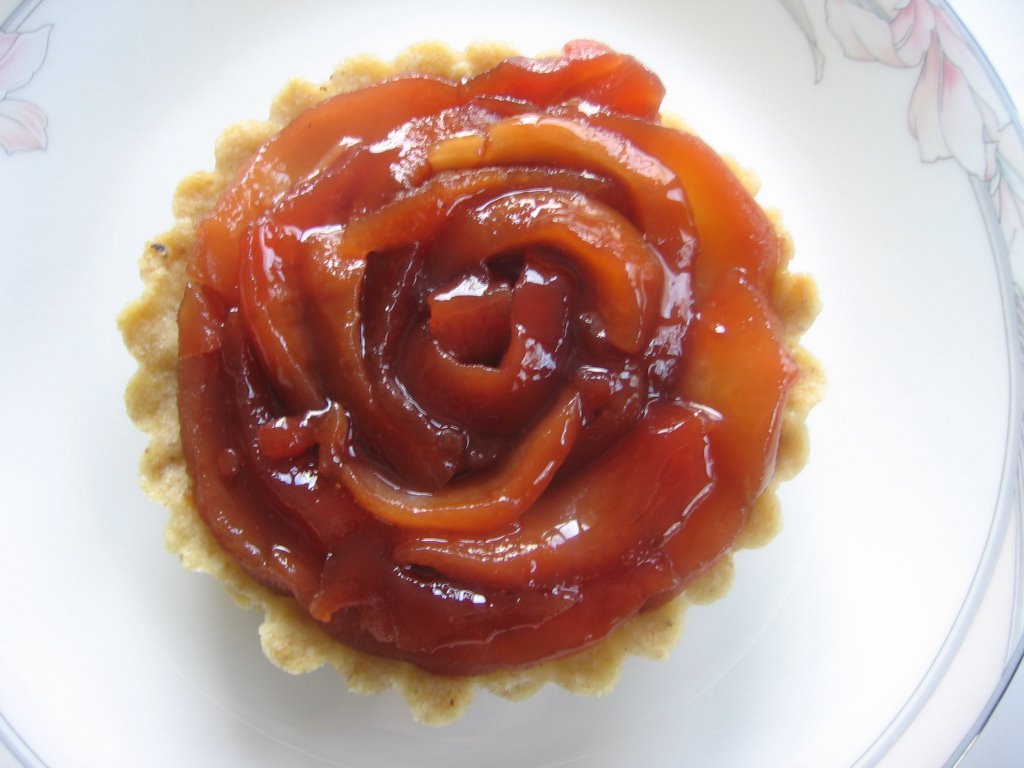
The theme for this month's Turkish blog event was quinces. The first challenge was to find them where I live. That accomplished, I was faced with another difficulty. I desperately wanted to make ayva tatlisi --a classical Turkish dessert that I had not eaten for years; yet, I knew that this choice would be far from original for my Turkish readers as it is probably the first thing that comes to a Turk's mind when quinces are mentioned. Eventually, I cheated by making this tart. I cooked the quinces just as I would if I were to make ayva tatlisi, I made a mascarpone filling which is close in taste to kaymak (clotted cream which is traditionally served with ayva tatlisi), and added a nut crust as a base. The tart turned out to be really delicious. If you haven't experienced baked/cooked quinces yet, I strongly suggest that you give this one a try.
For the Quince Topping:
4 medium size quinces, peeled, seeded and quartered (Do not discard the seeds and the peels as they'll be used to color the fruit during poaching.)
2 c water
2 c pomegranate juice
1/2 c sugar
A few cloves
For the Cream Filling:
1 c mascarpone cheese (You can substitute a cream cheese and heavy cream mixture if you must.)
1/3 c heavy cream
1/4 c (or less) sugar
For the Nut Pastry: (from Simple Tarts by Elizabeth Wolf-Cohen)
4 oz softened butter
1 small egg, lightly whipped or 1/2 egg if you can manage it.)
1/2 tsp vanilla or almond extract
3/4 c flour
1/4 c sugar
1/2 c finely ground almonds (or other nuts)
Place the prepared quinces in a preferably nonstick pan. Make a small bundle by wrapping the seeds in a piece of cheesecloth and place it with some of the peels in the pan. Mix the sugar with pomegranate juice and water and pour over the quinces. Cook over medium heat, turning the quinces every now and then, until they are soft and the syrup is reduced and thicker. (This may take a couple of hours depending on your fruit.) Remove the fruit as the syrup will probably gel as it cools.
While you wait for the quinces to cool, prepare the nut pastry. Lightly grease your tart pan. I used a 12"x3" tart pan; if you want to use a regular 9" one, you should probably double the ingredients for the crust. The quince slices and cream filling with the above quantities may be enough though, as I had quite a bit of leftovers --which were quite welcome-- when I made my tart. Cream the butter. Add the vanilla or almond extract and egg; mix until blended. Add the flour, sugar and ground nuts; mix until a uniform dough forms. This is quite soft, so you may need to refrigerate until it is of rollable consistency. Once rolled, prick it with a fork and refrigerate again. Bake at 350F for about 20 minutes. Cool.
For the cream filling, just whip mascarpone, cream and sugar until thick. Spread it in the cooled pastry crust. Thinly slice your cooled quince slices and arrange attractively on top of the cream filling. Brush the slices with the reserved quince syrup. If already thickened, you can warm it with a little water to dilute.
I made the tartlet below with the leftovers. It disappeared right after its picture was taken :)

 This tart is from The Art of the Tart by Tamasin Day-Lewis. My friend Ceyda made it first, and then she made it again, and then again for the third time in the course of a week. She did not bring us any samples, but she kept telling me how good it was. That was enough motivation for me to borrow the book from her and to give it a try myself.
 For the Chocolate Pastry Crust: